 Making your own bacon just gives you the opportunity to prepare it just the way you like it. Most people know that bacon is made from pork but for people that don’t eat pork, they can have the same great eating experience with beef bacon and even turkey bacon. The process I will be describing will be for pork from domestic pigs.
Basically, pork bacon is a product made from pork belly. The belly has alternate layers of meat and fat that gives it its unique ability for different finished cooked results depending on how you cook it. The bacon slices can be soft when cooked for less time and crispy when cooked longer. Each person has their preference but for me both ways are delicious.
Before being able to enjoy your bacon, the meat will have to go through a process known as curing. The curing process simply requires a certain amount of salt to change the appearance and taste of the meat. The salt is regularly mixed with some other ingredients to infuse different flavours.
Once the curing process is over, some people smoke the bacon to give it a robust signatory smoky flavour. If smoking is not required, once the cured and cooked process is finished the bacon is ready to consume. Smoking is just an extra step to add during the cooking. Preparing your own bacon can be regarded as a simple process once you’ve practiced a few times with a good base recipe and then as you feel confident just experiment with added ingredients to the base recipe to give it your signature flavoursome taste.
Let’s Get Started Then…
The following processes can be followed when making the desired bacon of your choice.
They include;
-

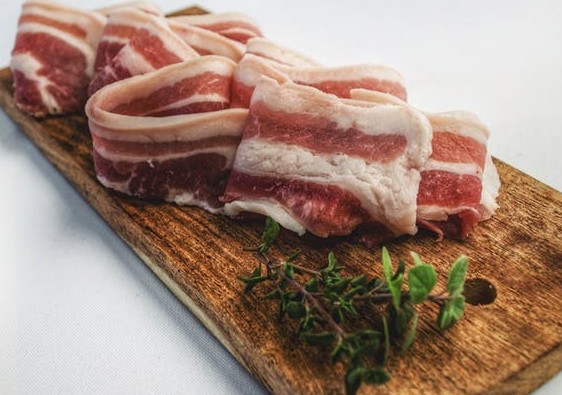
Image from Rainer Zenz Selecting the ideal pork belly…This simply implies that you select the best pork belly from hogs. You could try organic or non-organic and make your choice from the notable breed such as Berkshire, Kurobuta or Duroc. Make sure the belly has those nice layers of fat and meat and get it boneless to save you some time.

- Skin Removal…This is not necessary requirement as some people like to have a crispy skin when well cooked but leaving the skin on will make it harder to slice the bacon as the skin becomes hard after cured and processed. Removing the skin is not an easy task as you will need a sharp knife. You will need to run the blade under the skin from one corner and slowly cut and slice as you pull the skin upwards, outwards and off. Click HERE for a good demostration. Continue until the skin is removed and be very careful not to cut to deep into the fat or meat of the belly. If you think you will struggle with this task just ask your butcher to remove the skin for you. These people are pros and can do it for you very easily and quickly.
- Cure Preparation…The vital basic ingredients needed are salt and sugar with an optional curing salt, as a colour fixer, plus a little pepper. Once you have the basic base recipe perfected other ingredients can give a diverse range of flavours and uniqueness to your homemade bacon.
Changing to different sugar varieties may be used such as brown or white sugar, maple sugar or a frozen, dried cane sugar juice. Just use the same measurement for each variety desired. The pepper can be ground or cracked black pepper.
The ingredients should be mixed thoroughly with your hands ensuring no lumps. I have added a recipe below that you can use as your base recipe.
- Curing The Pork Belly…Place the belly on a rimmed baking sheet and pat dry with a paper towel. Use half of the salt cure mixture, sprinkle evenly over the surface of the belly, and gently rub into the meat and fat. Turn over and repeat on other side with remaining mix. It may seem like a lot but use it all up for the whole belly piece. Place the entire belly and curing mix into a large zip lock bag and place flat in a refrigerator for 5 days. Every day flip the belly and bag onto the other side. The salt cure mixture will transform to a liquid, which is normal. Give the belly a short massage, as you turn each day, to continue the infusing of the cure mixture into the meat.
Just a little helpful hint…If the belly is quite thick increase the days for curing to 7 to ensure the cure mixture has time to penetrate the meat fully. This cure process causes the action of osmosis where a stronger ingredient, being the salt, replaces the weaker solution, being the blood in the belly, and preserving the belly into bacon.
- Rinse And Dry The Belly…Next, transfer the bacon into a colander and rinse the two sides with cold water. This will remove the excess salt on and in the bacon. Pat dry with paper towels and leave to further dry out by placing back in the fridge on a rack uncovered, with a dish below to catch dripping liquid, for at least 24 hours.
- For Cooked Unsmoked Bacon…Roast and bake the cured belly in an oven at 200 F (93 C) until the internal temperature reaches 150 F (66 C). It should take about 2 hours but everyone’s oven is a little different so it is best to use a thermometer to make sure.
Your bacon is finished but leave to rest and cool at room temperature. 1 hour will do the trick before putting into your fridge in a well sealed container. Once fully cooled slice to your desired thickness and cook to your preferred bacon cooked method. Keep in the fridge the length of time as you would for any bacon that you buy at a store and can be frozen for up to 12 months.
- For Smoked Bacon… Skip the roasting in the oven part and set your smoker up following the manufacturers instructions. Preheat to 175 F (80 C). Allow the heat to rise to 200 F (93 C) and when ready, place the belly on a rack or hang in the smoker, if you have one like the Pit Barrel Smoker. The smoking time is the same as the oven method, approximately 2 hours or waiting for the internal temperature to reach 150 F (66 C). We are actually doing the same process of cooking but with the smoking addition. Use chunks, chips pellets or sawdust depending on your smoker’s requirements and hickory, apple wood and cherry wood work well. A charcoal smoker’s temperature may vary between 160 and 180 degrees, so it may take a little longer than 2 hours and as for an electric smoker, if you’d like to leave it at a steady 175 F (80 C), just increase the time. Extra time can give a nice a dark smoke finish.
- Rest The Bacon…As with the oven method for unsmoked bacon, rest and cool in the same manner as above. This is even better for the smoked bacon as it will improve the texture and flavour perfectly.
Using A Liquid Smoke…
- Another alternative for a smoke flavour, is by using a product called Liquid Smoke…You can cheat a little by using a liquid smoke formula. Best to only use a liquid smoke made from a natural wood smoke (usually hickory) and not one of the synthetic versions on the market. Roast the cured belly as you would in the oven cooking method for 2 hours and after removing from the oven, liberally add the liquid and basting evenly all over the meat while it’s still hot. Place the cooked bacon on a wire rack over a pan, to catch any liquid smoke drippings on your kitchen bench and allow to air dry for at least 30 minutes to an hour. Once dry and cooled sufficiently store in a tightly sealed container or bag and refrigerate. Let cool further the same as the methods above before slicing and cooking.
A Good Basic Recipe…
- 3 lb (1.360kg) skinless, boneless pork belly
- 3 tablespoons kosher salt
- 1/3 cup white sugar
- 2 tablespoons pepper, cracked or whole
- 1 teaspoon pink curing salt (Prague Powder #1)optional
Combine all ingredients and mix thoroughly ensuring that there are no lumps. Proceed with the instructions above and get your homemade bacon going.
Wrapping It All Up…
Making your own homemade bacon is very satisfying and enjoyable. It isn’t that hard but just takes a bit of time for the curing, cooking and smoking. Once that is over, basically, the last step involved for your bacon is slicing and cooking. And since the bacon is for you and your style alone, it can be sliced to anything you want. Whatever thickness or diced and chopped fine for quiches, omelets, homemade pizza toppings, bacon strips for burgers or simply for your hearty breakfast, the uses are endless. It’s up to you to enjoy it as you wish.
You will get better at making it and improve with each time, and experiment with different extra ingredients added to the basic recipe like garlic, rosemary or other herbs and spices such as paprika and chili. These extra ingredients can be in measurements of 1 or 2 teaspoons. There are even easy bacon making kits from Amazon that have rave reviews if you want to take the easy way out. Whatever you decide, it will be your own homemade bacon with your own uniqueness and foods we prepare ourselves always taste that little bit special.
Enjoy…John
